Stitching Cards
Introduction and Technique
Description
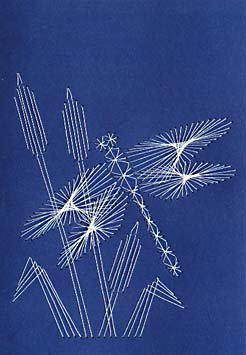 |
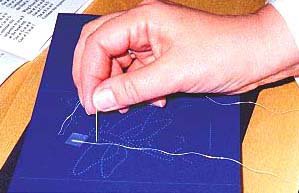
A beautiful card made by
stitching the dragonfly design directly on the card. The dark blue
card is 104mm x 152mm. It is stitched with pearl metallic thread.
This design takes approximately one hour to stitch.
Product links
The card being used to demonstrate
the techniques of stitching a card is from Form-A-Lines
Riverside
Delights kit. (see link below)
|
Method
Step One: Protect your work surface
with a piece of foam, a felt mat or a folded towel. Open up the card and
with the right side facing up, lay a design template on the middle
section.
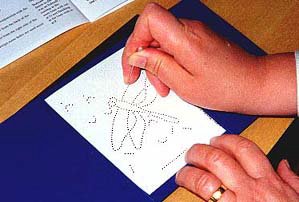
Step Two: Holding the template in
place, take the large pin and prick through each dot in turn on the
template making sure that the pin also goes through the card. Remove the
template when the entire design has been completed.
Hint
- If you wish to secure your template to the card with sticky tape,
place the tape on and off a cloth several times. This will take off the
excess stickiness yet still allow it to adhere to the card without
leaving a mark. To test first use the reverse of the right panel as this
will eventually be hidden.
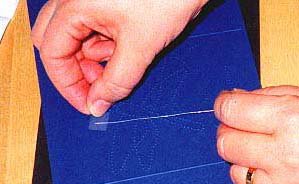
| Step three: Cut a
length of thread about 2 feet long and thread the needle. (It is
better to use several short threads rather than one long piece as
the holes of the card may start to wear away the filament in the
thread and cause it to fray.
The underside of your work will be
hidden so it does not matter how many times you seal your threads.)
Attach the thread to the back of the card, close to the starting
point, with a small piece of sticky tape, making sure that you do
not cover over any holes. |
 |
 |
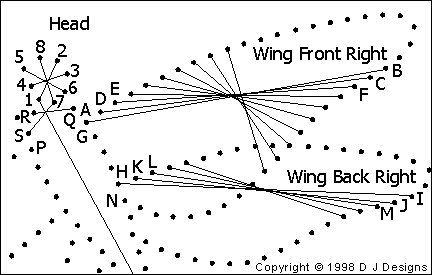
Step Four: Follow instructions for
each embroidered design, securing each length of thread with a small piece
of sticky tape. |
Stitching
Diagram
Fuller
instructions and details
If you want to try the
technique for yourself before purchase
there are some free projects at:
Card
Inspirations stitching card projects.
Copyright © 2000-2020
Hints and Things
All Rights Reserved.
No portion of this site may be reproduced or redistributed without prior
written permission from Hints and Things. All trademarks & copyrights
throughout Hints and Things remain the property of their respective
owners.
Hints and Things cannot be
held responsible for any information given on this site nor do they
necessarily agree with, or endorse, the views given by third parties.
|